


November 19, 2018
Lesson: Limit Daily Email Frequency
How can you prevent a contact from receiving too many emails on the same day? Leverage these tips to manage your send frequency.
The more journeys you publish, the more potential there is for contacts to enter multiple tracks. Luckily, Autopilot offers a few fool-proof ways to prevent contacts from receiving more than one email per day. These features enable you to check whether a contact is within an existing journey to help minimize the risk of overwhelming your audience with too many successive messages.
In this lesson, you’ll learn how to:
- Prioritize your marketing messages
- Send messages on specific days of the week
- Tag contacts within a journey
- Leverage timestamps
The average person receives over 120 emails per day.
Source: Radicati Group
Prioritize your marketing messages
You receive an email from a customer, complaining that they received a newsletter, sales touch, webinar invitation, and feedback survey—all within a five-hour window. If this sounds familiar, your contacts are experiencing email fatigue.
Most of the time, it’s not a big deal if a contact receives multiple messages in one day—assuming they’re all relevant, personalized, and contextual. They look forward to that order shipping confirmation, new follower notification, discount code, or usage summary that demonstrates their success with your product.
The frustration occurs when a contact receives too many low-value touches. Initially, you might see a spike in unsubscribe rates and spam complaints. But if you consistently send generic marketing, it can inflict long-term damage on your brand’s reputation over time. Avoid this fate by managing your send frequency.
If you consistently send generic marketing, it can inflict long-term damage on your brand’s reputation over time
To start, take a full accounting of the different messages you send throughout the customer journey. Consider the types of emails your company automates, such as lead nurturing or transactional messages, as well as those that are sent on a regular basis, like your monthly newsletter or regular product updates.
Next, outline the hierarchy of your marketing touch points. Which journeys and communications take priority? Consider which messages will drive them toward the action you’d like them to take next. This exercise will help you choose the most appropriate option for managing your email frequency, whether it’s sending certain messages on a specific day of the week, tagging contacts, or using timestamps.
Send messages on specific days of the week
For regularly sent emails, like your monthly newsletter, it’s best to standardize the day of the week that they’re sent. Spacing these emails out throughout the month helps you prevent contacts from receiving too many promotional emails.
You’ll also gain a better understanding of which days of the week perform better in terms of open and click rates. For example, you might find through A/B testingthat your lead nurture emails perform best on Tuesdays while your promotional ones perform better on Thursdays. The key is to optimize your schedule based on how each email performs to get the most value from your sends.
Pro tip: Don’t constrain transactional emails to specific days of the week. When customers make a purchase or submit a form, they should receive your confirmation messages right away. Keep this in mind when honing in on your communication priorities.
To get the most value from email marketing, optimize your send schedule based on performance
How to configure it in Autopilot
Let’s use a basic, time-based nurture journey as an example. In this journey, you’ll use delay actions to space out the time between emails sends. Depending on your nurture frequency, you may wait a few days between touches or a few weeks.
Step 1. Drag and drop the add delay action between your first and second emails, then connect the shapes.
Add a delay step between your emails
Step 2. Click the shape to configure the delay. Select “Enable time and day window”, then choose the day(s) of the week you’d like customers to receive your email.
Configure the time and day delivery window
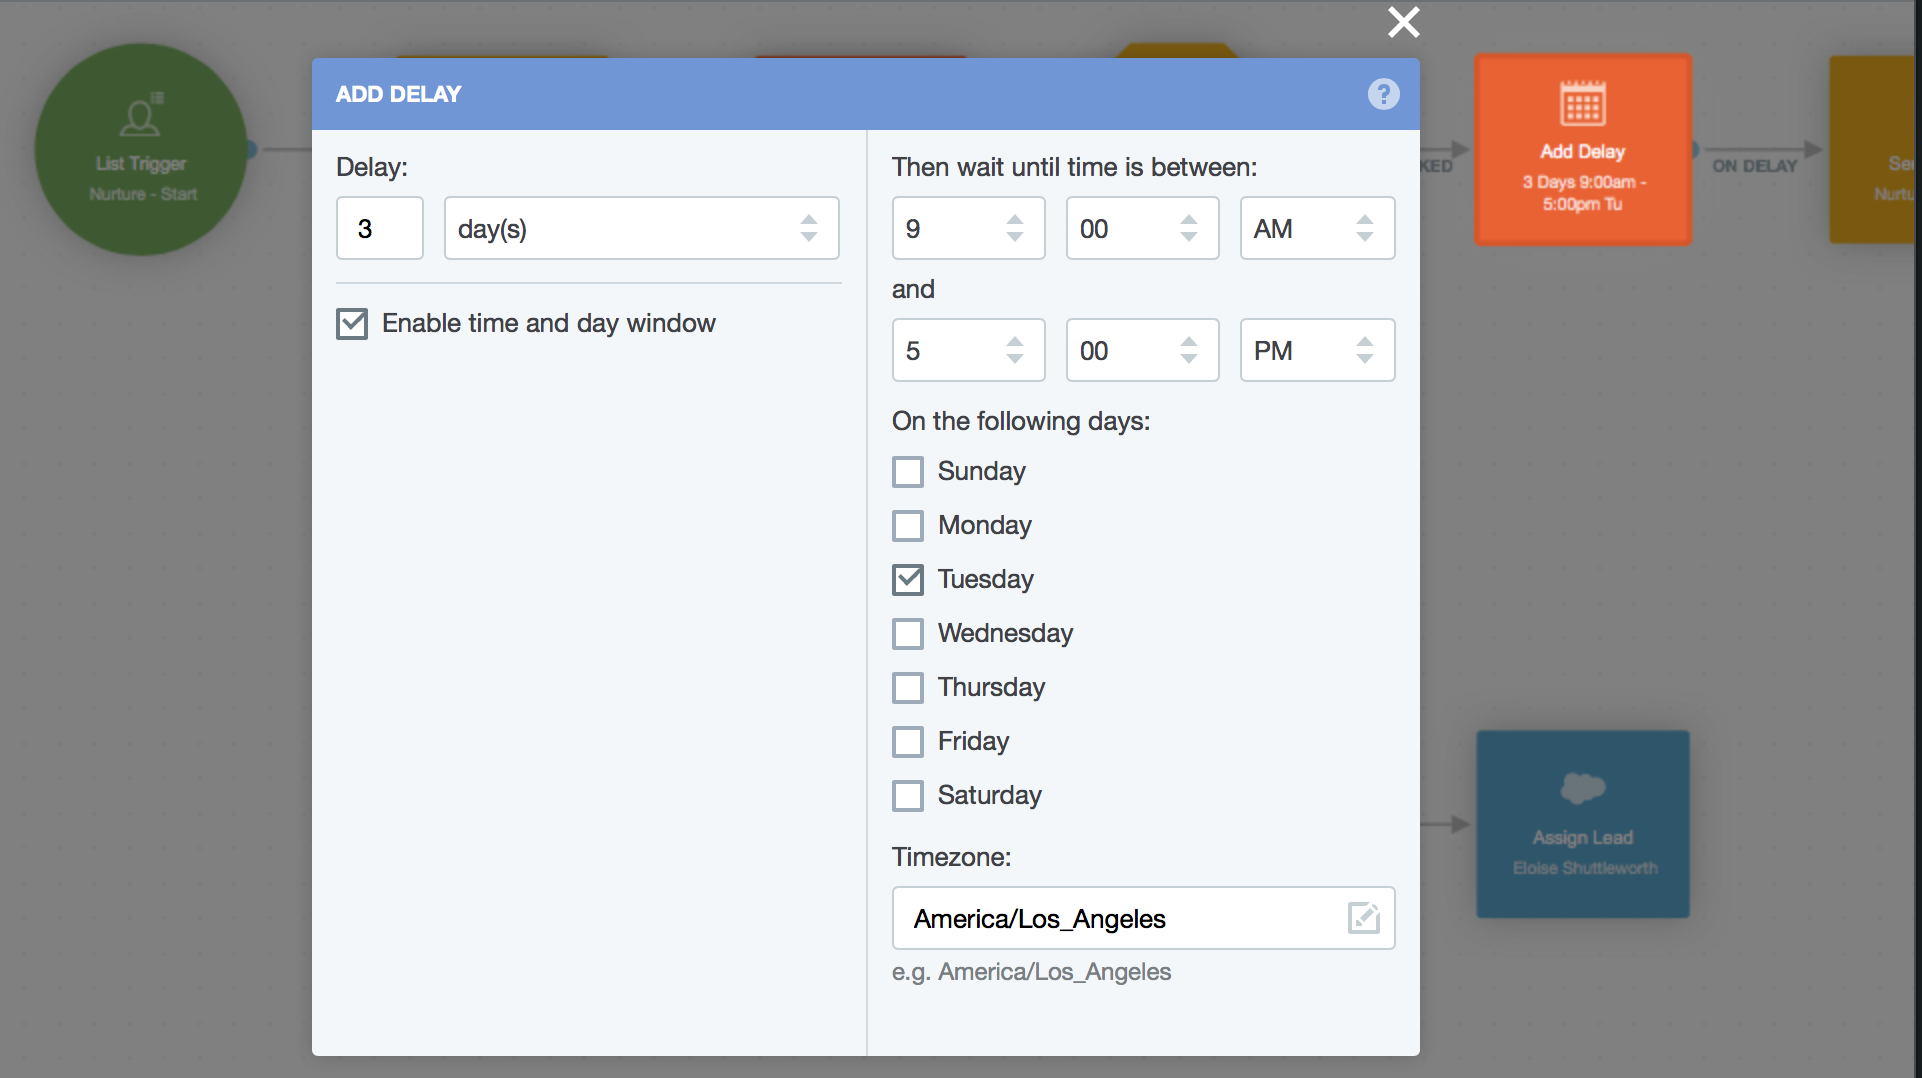
In the example above, three days after the first email is sent, Autopilot will check to see if the day and time are both within the window you defined when you configured the shape. If it isn’t a Tuesday after 9 AM and before 5 PM, the second email will be placed on hold until the next delivery window.
You can use this method in other journeys to ensure your emails are sent at optimal times. When scheduling a one-time promotional email, select a day and time that doesn’t conflict with your standardized sends. For example, if your nurture emails go out on Tuesdays and your monthly newsletter goes out on Thursdays, try sending your one-time promotional emails on Mondays, Wednesdays, or Saturdays.
Tag contacts within a journey
In some cases, identifying whether a contact is already part of a specific journey is more important than the day of the week they’re receiving communications.
One instance in which this could be the case is the lifecycle nurture journey where you’re simultaneously educating prospects and driving them to sign up for a free trial or make a purchase. Because they’re already regularly receiving nurture communications, you may want to prevent them from receiving other touches. In situations like this, we recommend incorporating a tagging convention.
How to configure it in Autopilot
You can add a tag to a contact record to mark they’re part of a journey by adding contacts to a static list. In the following example, we’ll demonstrate how to remove contacts who are in an active nurture journey from receiving promotional emails.
Step 1. Create a list that denotes someone is part of your nurture journey. In this example, we’ve created a list titled, “In Automation”. You can choose to create a similar list or one that is journey specific.
Create a list to indicate a contact is part of your journey
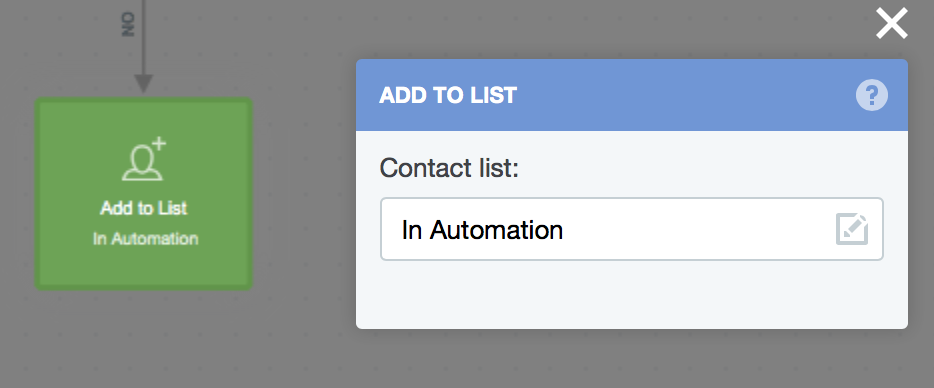
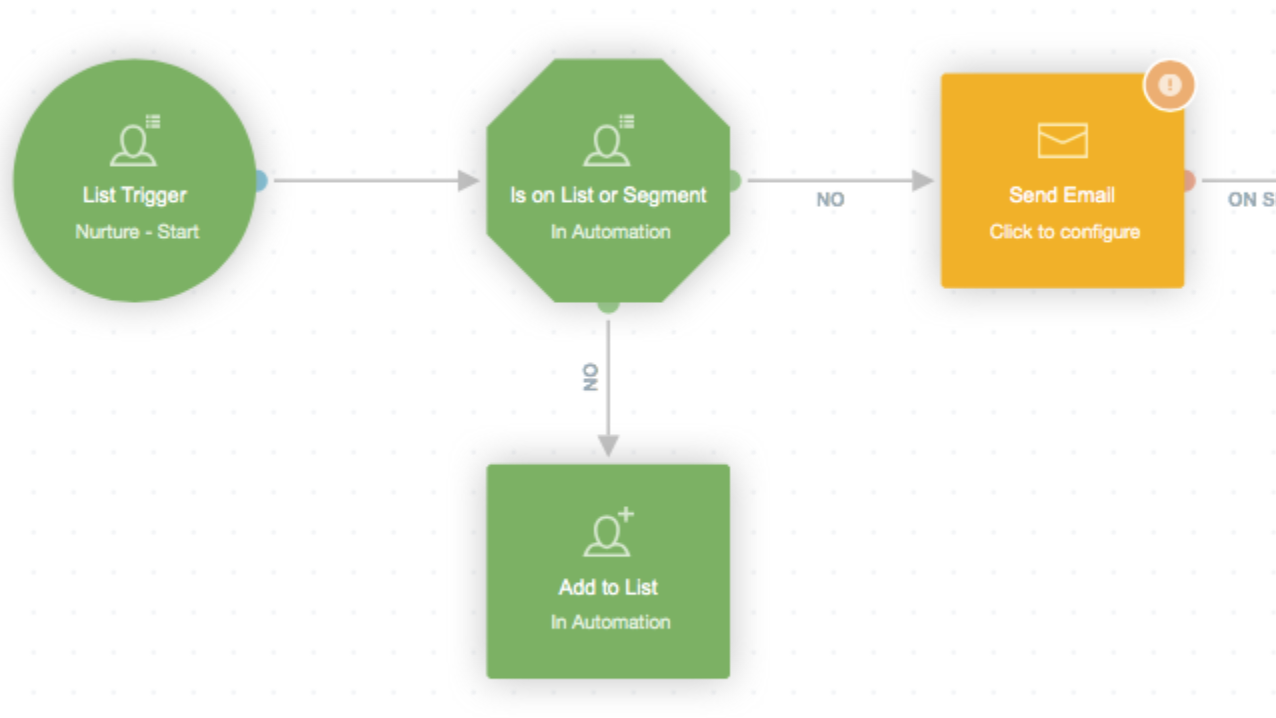
Step 2. Drag the is on list or segment condition onto the canvas and place it immediately following the trigger. To prevent contacts who are on the list from progressing further, use the “No” outcome arrow to connect to the next shape within your journey. Then create a secondary “No” connection to the add to listaction to tag new entrants to the journey.
Use the is on list or segment condition to remove those in another automation
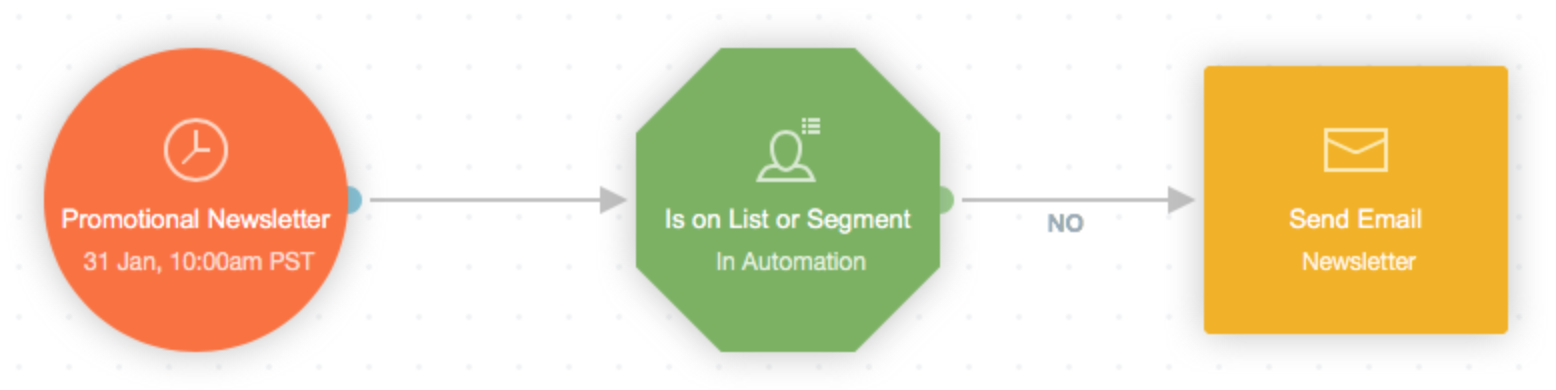
Step 3. To exclude contacts who are actively being nurtured from any promotional journeys, add an is on list or segment condition after the trigger.
Remove contacts within a nurture track from a promotional newsletter send
Step 4. Once a contact has completed the journey (or they qualify to be withdrawn by ejection), use the remove from list action to remove them from the “In Automation” list.
Where should you place this shape in the journey? It depends on your journey configuration. One option is to place the shape after the final action within the journey:
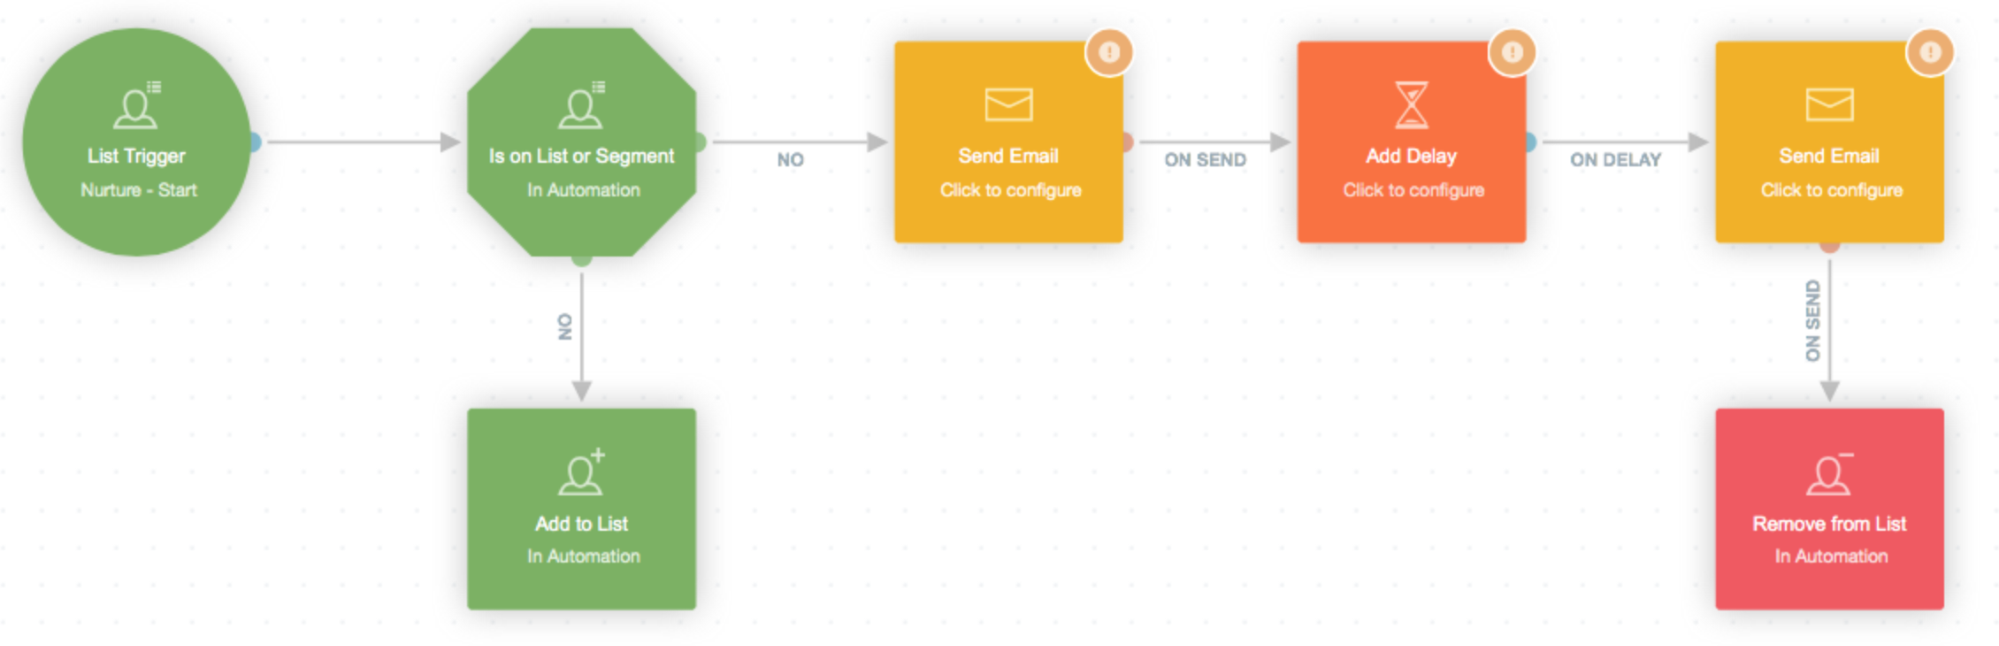
Remove contacts from a list at the end of a journey
Alternatively, you can untag contacts as part of the ejection process. Because nurture journeys drive toward a specific goal, using the ejection shape ensures everyone who crosses a certain threshold is also removed from the journey.
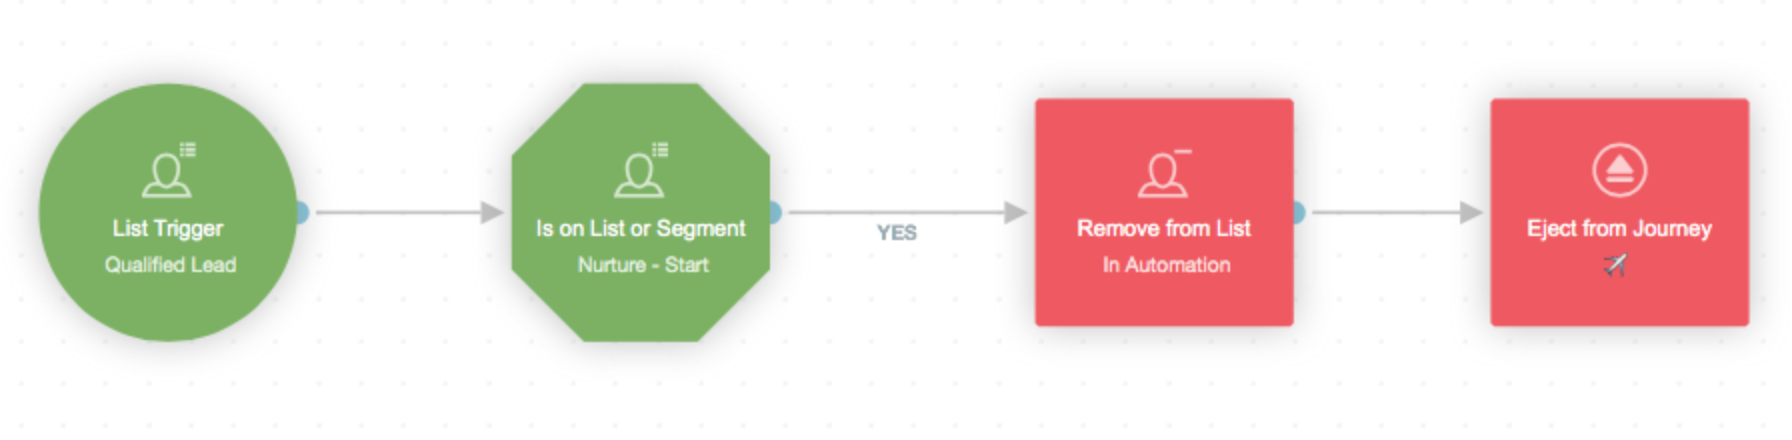
Remove contacts as part of an ejection journey
Leverage timestamps
Another option is updating a field with a timestamp based on when the last email was sent. We recommend leveraging this tactic when you’re regularly sending batch emails and want to prevent sending too many within a short period of time.
An advantage of using this method is the ability to use the timestamp field to segment your database via smart segments.
How to configure it in Autopilot
Step 1. Create a custom field called “Last Email Sent” using the “Date” data type.
Step 2. From within your journey, drag and drop the email activity trigger and update field action onto the canvas, then connect it to the activity you want to timestamp. In this example, we’re updating the “Last Email Sent” custom field whenever a contact has been sent an email.
Step 3. Next, type –today– into the “Update to” field. Doing so will update the field with the date the email is sent.
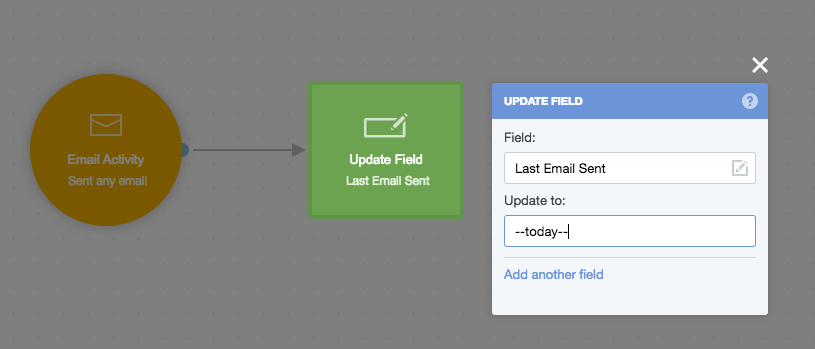
Configure the update field action using the --today-- personalization variable
Step 4. To ensure contacts don’t receive more than one email per day (or within whatever timeframe you decide), use the check field condition in all relevant journeys to segment contacts based on the “Last Email Sent” field.
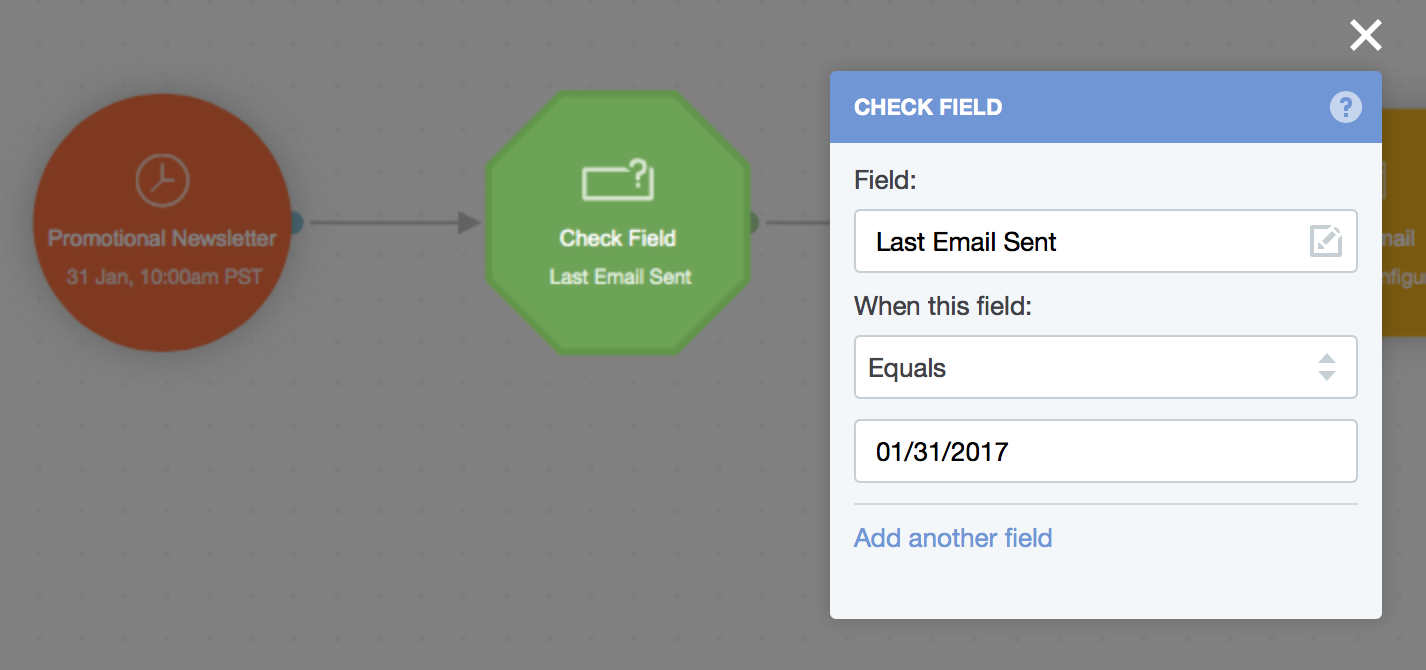
Prevent contacts who have received another email by using a condition check on the last email sent field
We suggest using this same principle to create an operational journey that timestamps whenever an email has been sent, clicked or opened. This will provide you with more flexibility should you ever want to segment off of this data.
Update a timestamp each time an email is sent, opened, or clicked
Tracking this data adds an element of time. For example someone that opens an email a year ago versus today should be communicated with differently.
Companies who connect with their contacts every two to four weeks generate double the leads. Ensure your contacts are receiving only the most relevant communications by incorporating time and date windows, tags, and/or timestamps.


